

How to Compress Images Without Losing Quality
Large image files can make websites slow, consume unnecessary storage, and increase loading times. Whether you're a blogger, developer, online seller, designer, or student, knowing how to compress images without losing quality is an essential skill.
The good news is that image compression doesn't have to make your photos blurry or pixelated. With the right techniques and tools, you can significantly reduce file sizes while maintaining excellent visual quality.
In this guide, you'll learn how image compression works, when to use different formats, and how to optimize your images for websites, social media, email, and everyday use.
What Does It Mean to Compress Images Without Losing Quality?
Compressing images without losing quality means reducing an image's file size while preserving its visual appearance as much as possible. Modern compression methods remove unnecessary data or optimize how the image is stored, making files smaller without noticeable quality loss.
Image compression helps you:
- Improve website speed
- Save storage space
- Upload files faster
- Reduce bandwidth usage
- Improve SEO performance
- Enhance user experience
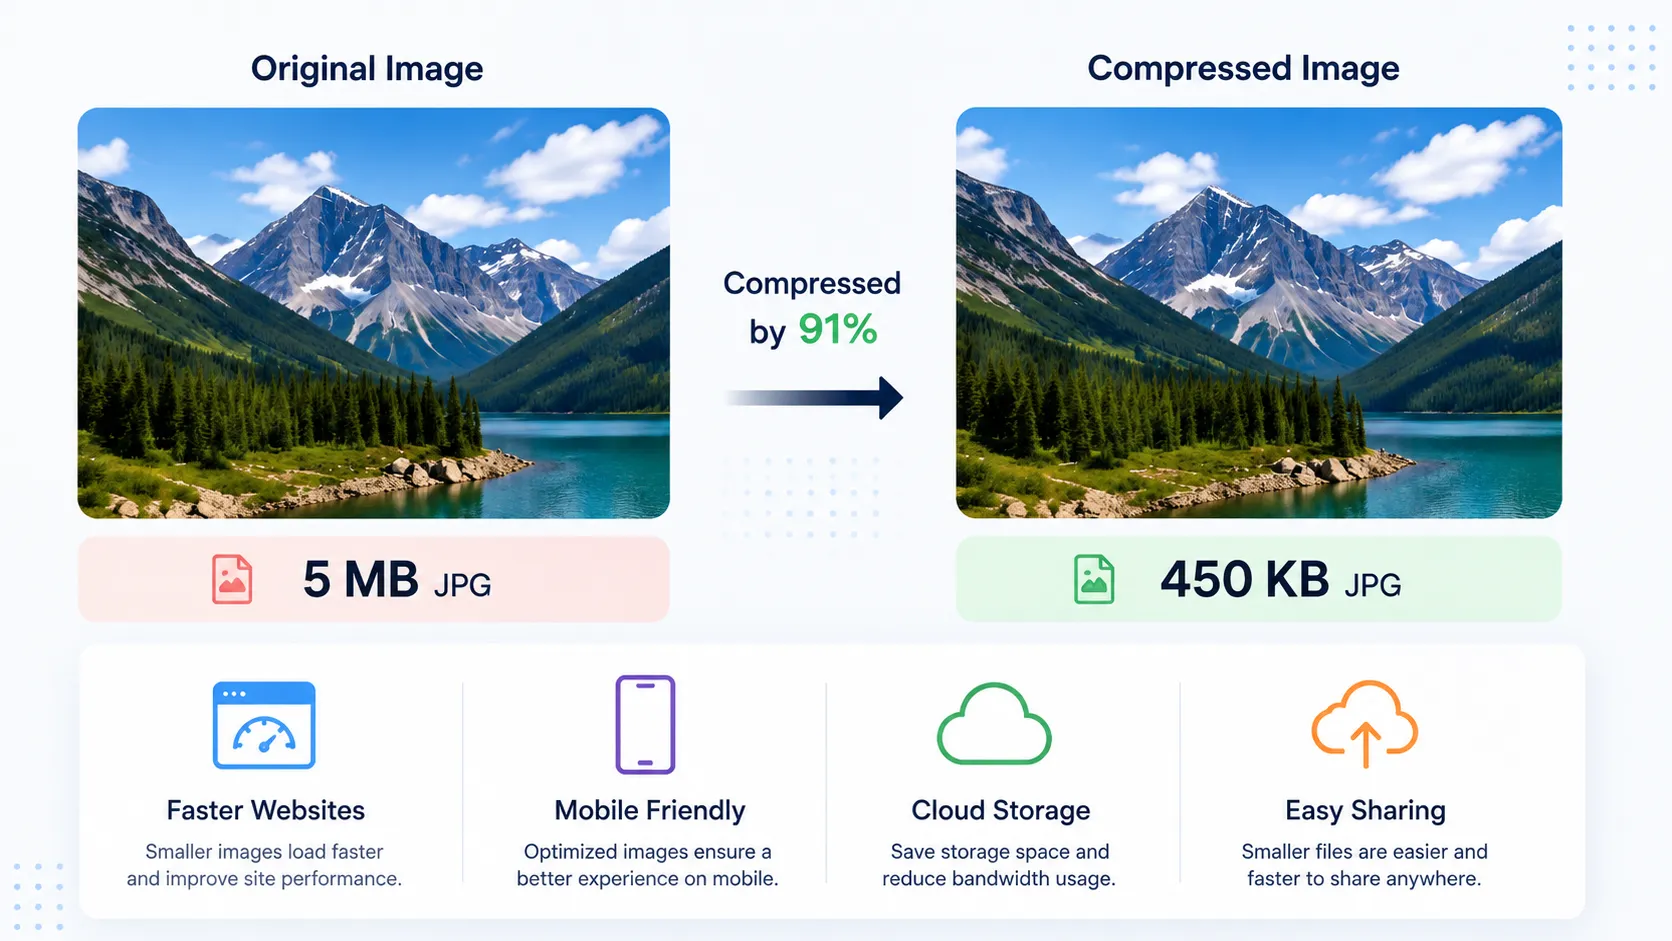
For example:
| Before Compression | After Compression |
|---|---|
| 5.2 MB JPG | 780 KB JPG |
| Same appearance | Same appearance |
| Slow loading | Faster loading |
Why Image Compression Matters
Images often make up the largest portion of a webpage. Large files increase page load times, which can negatively affect user experience and search engine rankings.
Benefits include:
- Faster websites
- Better Core Web Vitals
- Improved SEO
- Lower hosting costs
- Better mobile performance
- Faster email attachments
- Easier cloud storage
According to Google, faster websites generally provide a better user experience and can contribute to improved search performance.
How Image Compression Works
There are two main types of image compression.
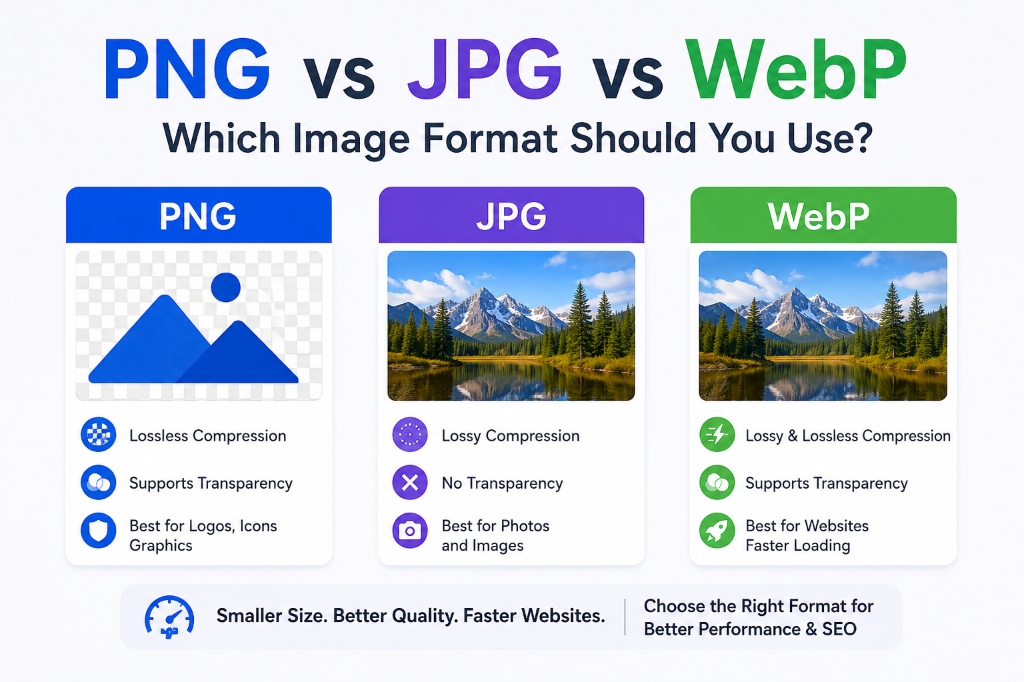
1. Lossless Compression
Lossless compression reduces file size without permanently removing image data.
Best for:
- PNG
- Logos
- Screenshots
- Graphics
- Documents
Advantages:
- No visible quality loss
- Can be edited repeatedly
- Perfect for professional work
2. Lossy Compression
Lossy compression removes some image data to achieve much smaller file sizes.
Best for:
- JPEG photos
- Travel images
- Product images
- Blog images
Advantages:
- Much smaller files
- Faster websites
- Great balance between size and quality
When done properly, the quality difference is nearly impossible to notice.
Best Image Formats for Compression
| Format | Best Use | Compression |
|---|---|---|
| JPEG | Photos | Excellent |
| PNG | Graphics | Good |
| WebP | Websites | Excellent |
| AVIF | Modern websites | Outstanding |
| SVG | Icons | Very Small |
For most websites, WebP provides one of the best combinations of quality and file size.
Step-by-Step: How to Compress Images
Step 1: Choose the Right Image Format
Different formats serve different purposes.
- JPEG for photographs
- PNG for transparency
- WebP for websites
- SVG for vector graphics
Choosing the correct format can reduce file size before compression even begins.
Step 2: Resize Large Images
Many people upload images much larger than necessary.
Example:
Original:
4000 × 3000 pixels
Website display:
1200 × 900 pixels
Uploading oversized images wastes bandwidth.
Before compressing, resize the image to its intended display dimensions.
Step 3: Use an Image Compressor
Upload your image into an online compressor.
Our free Image Compressor quickly reduces image size while maintaining excellent quality.
👉 Related Tool:
Image Compressor - Image Compressor
Step 4: Compare Before and After
Always compare:
- Image sharpness
- Colors
- Text readability
- Edges
- Fine details
If you can't notice any difference, you've found the right compression level.
Step 5: Download and Use
Save the optimized image and upload it to your:
- Website
- Blog
- Shopify store
- Portfolio
- Social media
- Email campaign
Practical Examples
Example 1: Blogger
Original:
4 MB featured image
Compressed:
420 KB
Result:
- Faster loading
- Better SEO
- Improved visitor experience
Example 2: Online Store
100 product images
Original storage:
500 MB
After compression:
70 MB
Benefits:
- Faster product pages
- Better conversions
- Lower storage costs
Example 3: Student
PDF assignment contains large images.
Compressing images first reduces the final PDF size dramatically without affecting readability.
Common Mistakes to Avoid
Compressing Multiple Times
Repeated compression can gradually reduce image quality.
Always keep the original image.
Choosing the Wrong Format
Using PNG for large photos often creates unnecessarily large files.
Instead:
Use JPEG or WebP.
Uploading Oversized Images
Don't upload images that are much larger than they appear on screen.
Resize first.
Compress second.
Compressing Too Aggressively
Reducing file size too much can produce:
- Blurry photos
- Pixelation
- Color artifacts
Aim for the smallest size that still looks visually identical.
Image Compression Tips for Better SEO
Optimized images help search engines understand and serve your content more efficiently.
Best practices:
- Use descriptive filenames
- Add meaningful alt text
- Compress every image
- Use responsive image sizes
- Choose modern formats like WebP
- Enable browser caching
- Use lazy loading where appropriate
Together, these practices improve website performance and user experience.
Recommended Free Tools
TechbyJeel Tools offers several utilities that complement image compression:
- Image Compressor - Image Compressor
- Image Resizer - Image Resizer
- Image Converter - Image Converter
- Image Cropper - Image Cropper
- PDF Merge - PDF Merge
These tools work together to simplify image optimization workflows.
External Resources
For additional guidance, explore these trusted references:
- Google PageSpeed Insights: https://pagespeed.web.dev/
- Google Image SEO: https://developers.google.com/search/docs
- MDN Web Docs on Image Formats: https://developer.mozilla.org/
- WebP Documentation: https://developers.google.com/speed/webp
- W3C Web Standards: https://www.w3.org/
Summary
Image Compression Checklist
✅ Resize images before uploading
✅ Choose the correct format
✅ Compress every image
✅ Compare quality before publishing
✅ Keep original files
✅ Use WebP when possible
✅ Add descriptive alt text
✅ Optimize for SEO
Conclusion
Learning how to compress images without losing quality is one of the easiest ways to improve website speed, reduce storage requirements, and deliver a better experience for your visitors.
By selecting the right image format, resizing oversized images, and using an efficient compression tool, you can significantly reduce file sizes without sacrificing visual quality. These small improvements add up to faster pages and better overall performance.
If you're looking for a quick and reliable solution, try the free Image Compressor on TechbyJeel Tools. It helps you optimize images in just a few clicks while preserving the quality your audience expects.
Explore more free image utilities on TechbyJeel Tools, including the Image Resizer, Image Converter, and Image Cropper, to streamline your entire image optimization workflow.
FAQ Section
1. Can I compress JPEG images without losing quality?
Yes. While JPEG uses lossy compression, modern compression tools can reduce file size significantly with little or no visible difference. Choosing an appropriate compression level preserves image quality for most practical uses.
2. Which image format is best for websites?
WebP is one of the best formats for modern websites because it provides excellent image quality with much smaller file sizes than JPEG and PNG. Many browsers support WebP, making it a popular choice for faster web pages.
3. Does image compression improve SEO?
Yes. Smaller images help pages load faster, improve Core Web Vitals, reduce bandwidth usage, and provide a better user experience. These factors can contribute to improved search engine performance.
4. Should I resize images before compressing them?
Yes. Resizing images to their intended display dimensions before compression removes unnecessary pixels, resulting in smaller files and more efficient optimization without affecting how the image appears on your website.
5. Is lossless compression always better than lossy compression?
Not necessarily. Lossless compression preserves all image data but produces larger files. Lossy compression creates much smaller files and is often the better choice for photographs when high visual quality is maintained.